WooCommerce
- Introduction
- Install Plugin
- Connect to Smart Send
- Setup shipping methods
- Pick-up points
- Create Shipping Labels
- Tracking
- Supported plugins
Introduction
Using Smart Send then it is possible to integrate your WooCommerce webshop with Smart Send making it possible to easily:
- Show pick-up points directly on the WooCommerce checkout page
- Create of shipping labels directly from WooCommerce
This guide will help you connect your Woocommerce e-commerce store with your Smart Send account and guide you through the required configuration.
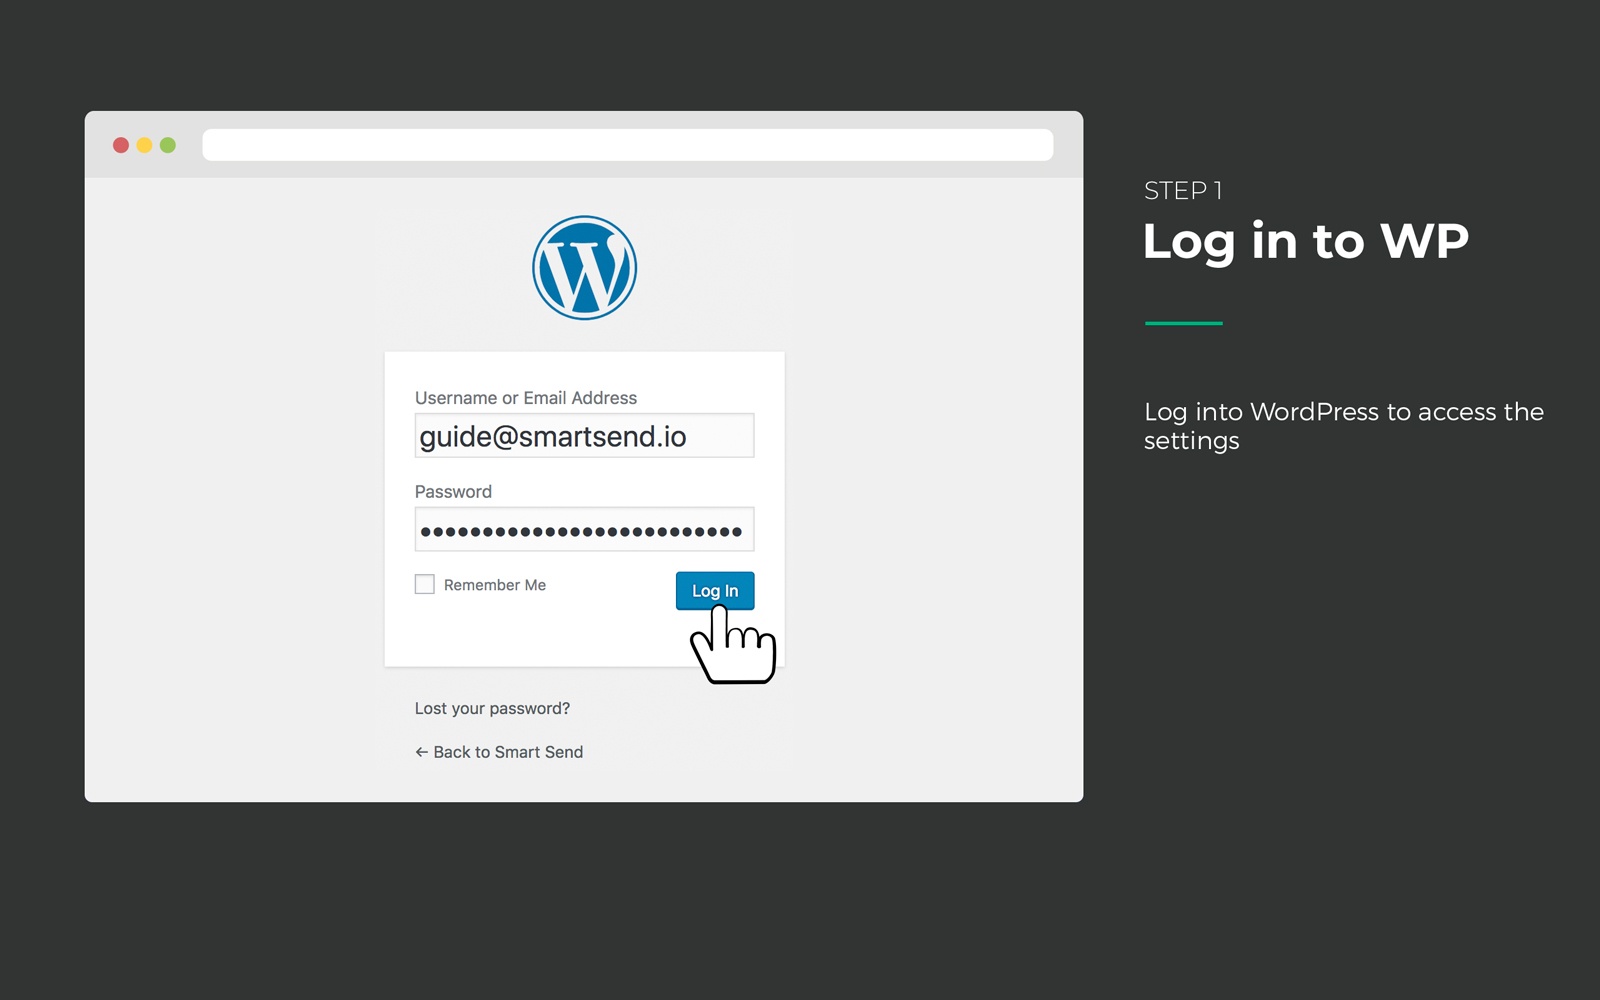
Install Smart Send's WooCommerce plugin
- Login to your WooCommerce webshop
- Go to the Plugins tab and chose "Add New"
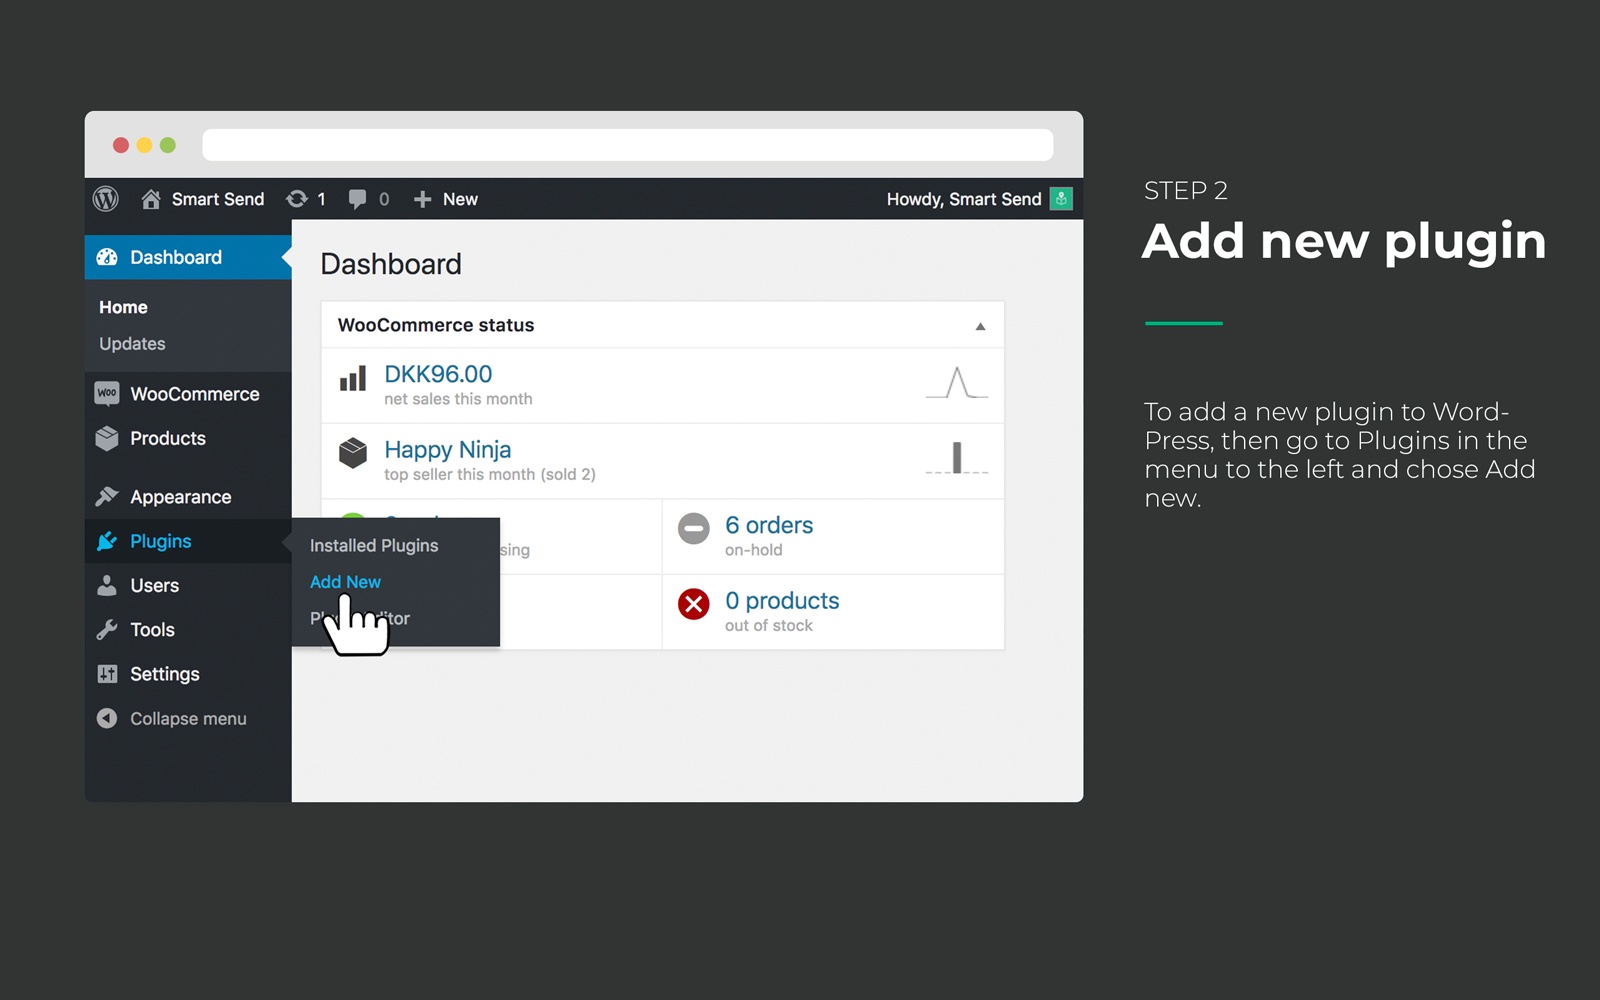
-
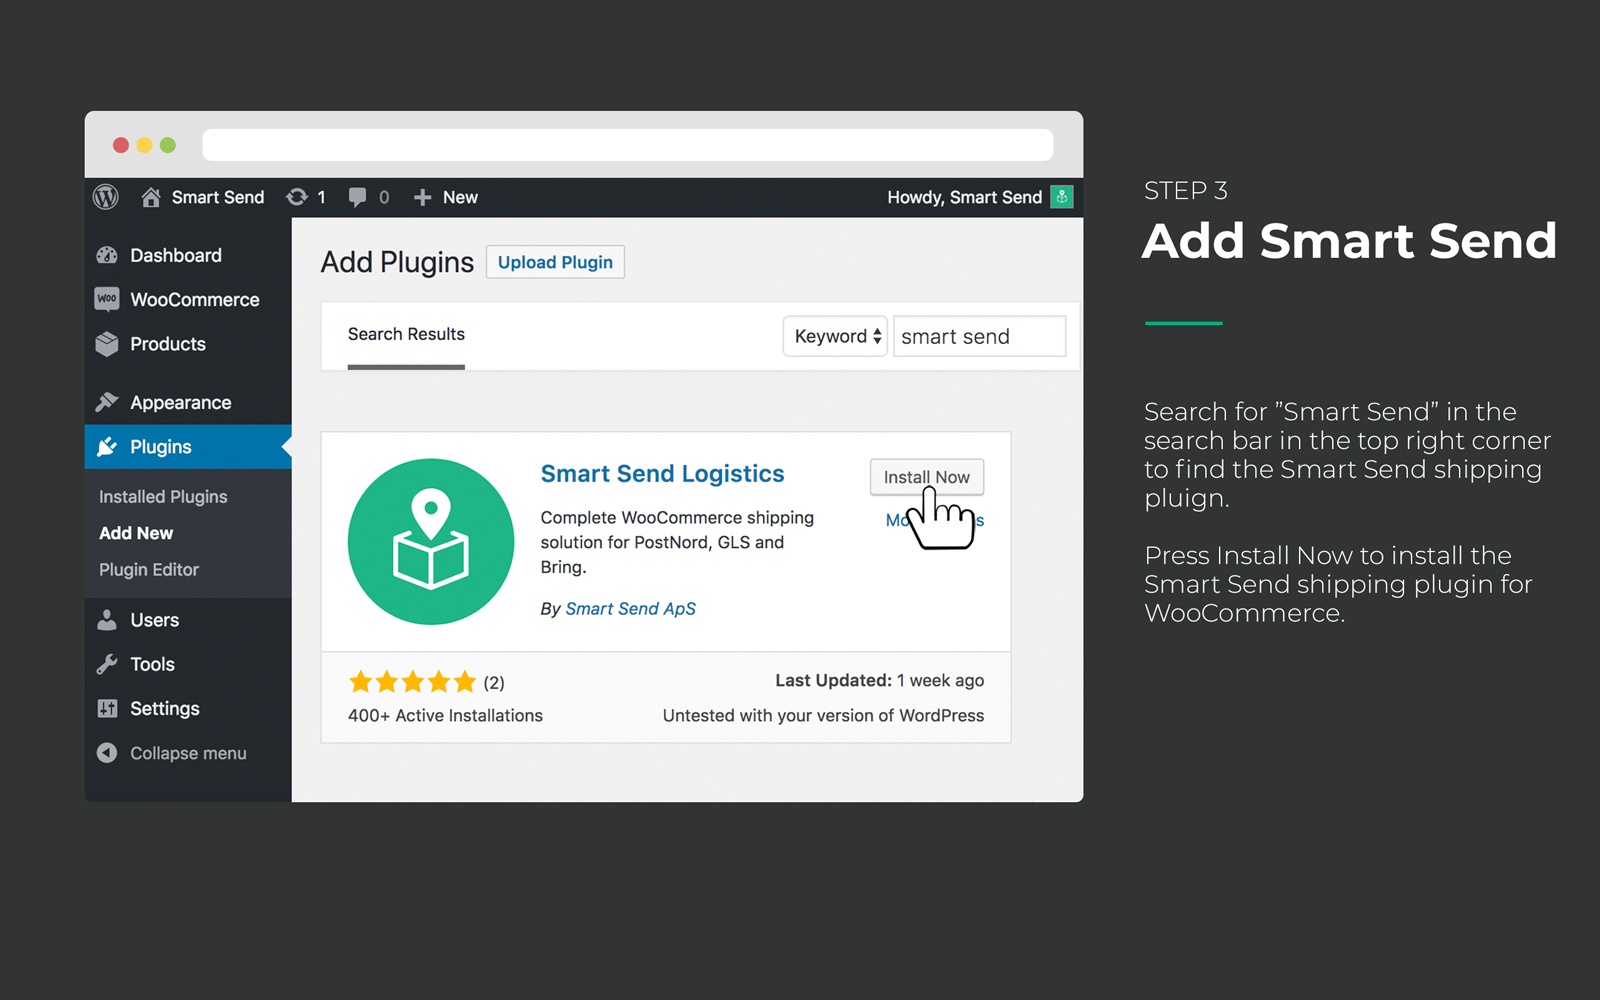
In the search field search for: Smart Send Logistics or use the link here: Smart Send WooCommerce Plugin
-
Choose the Install Now option.
- When the plugin has been installed make sure it is activated.
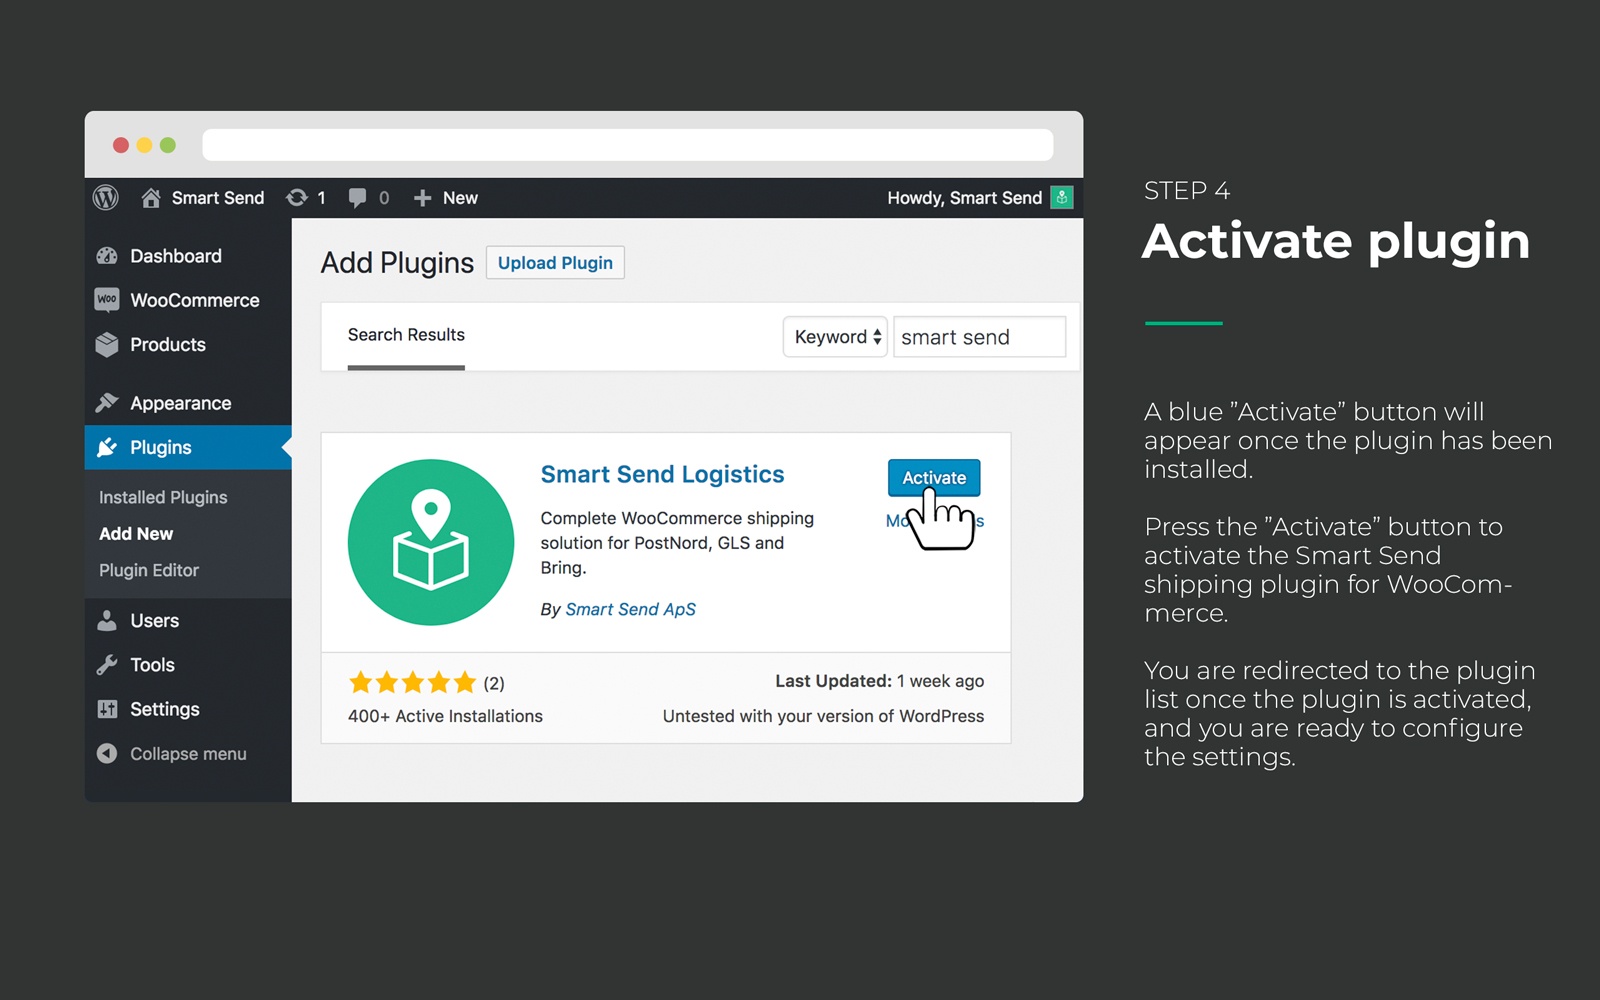
You are now ready to proceed to the WooCommerce - Connect to Smart Send
Connect to Smart Send
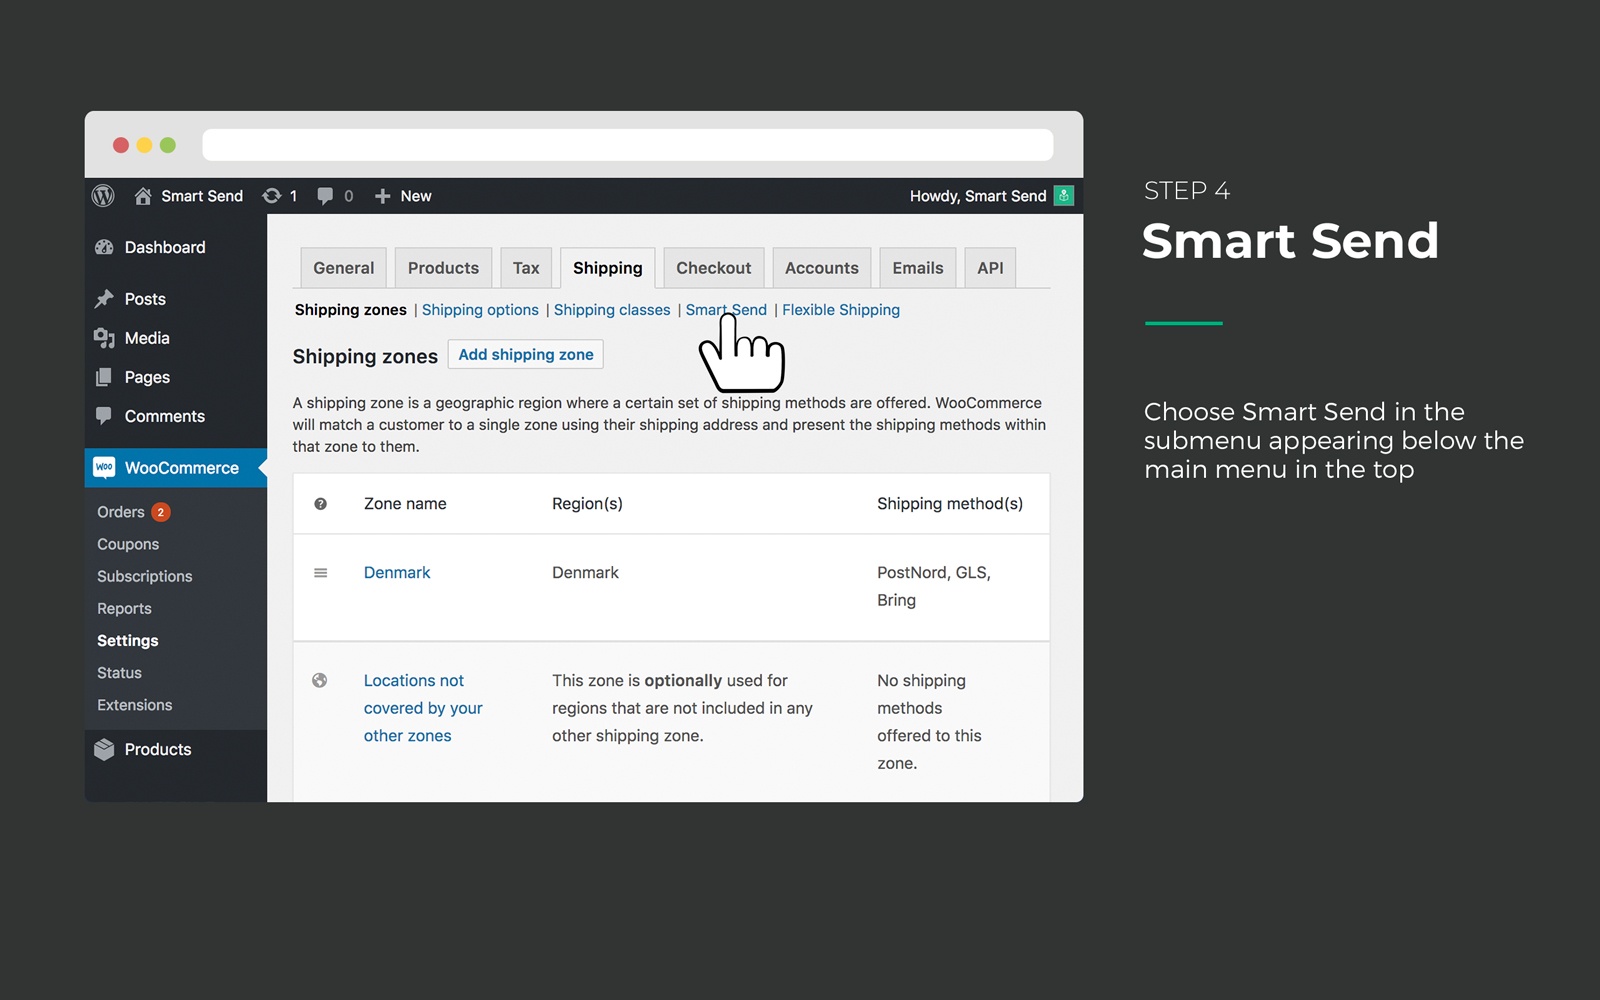
-
Go to the tab WooCommerce and click on the shipping tab. You can now choose the Smart Send submenu.
-
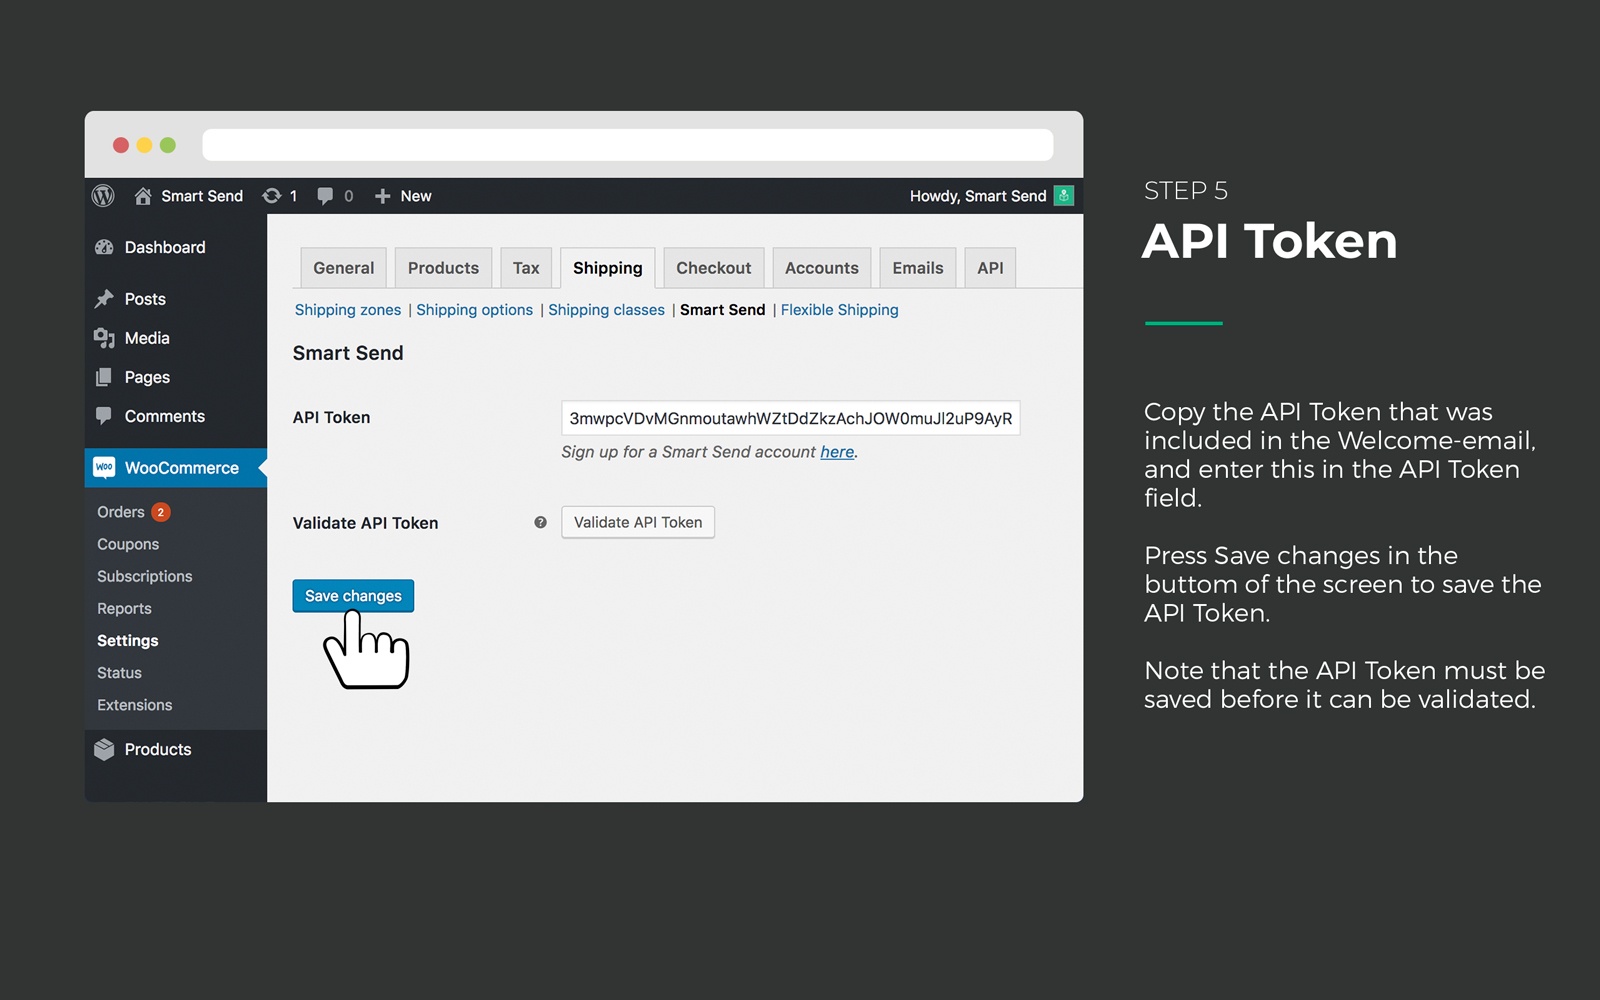
This tab is for you generel Smart Send settings, valid for the whole webshop. Insert the API Token you have received during the creation of your Smart Send user. If you do not have a Smart Send user yet, you can create one here: Create user Remember to save the changes before validating the api token.
-
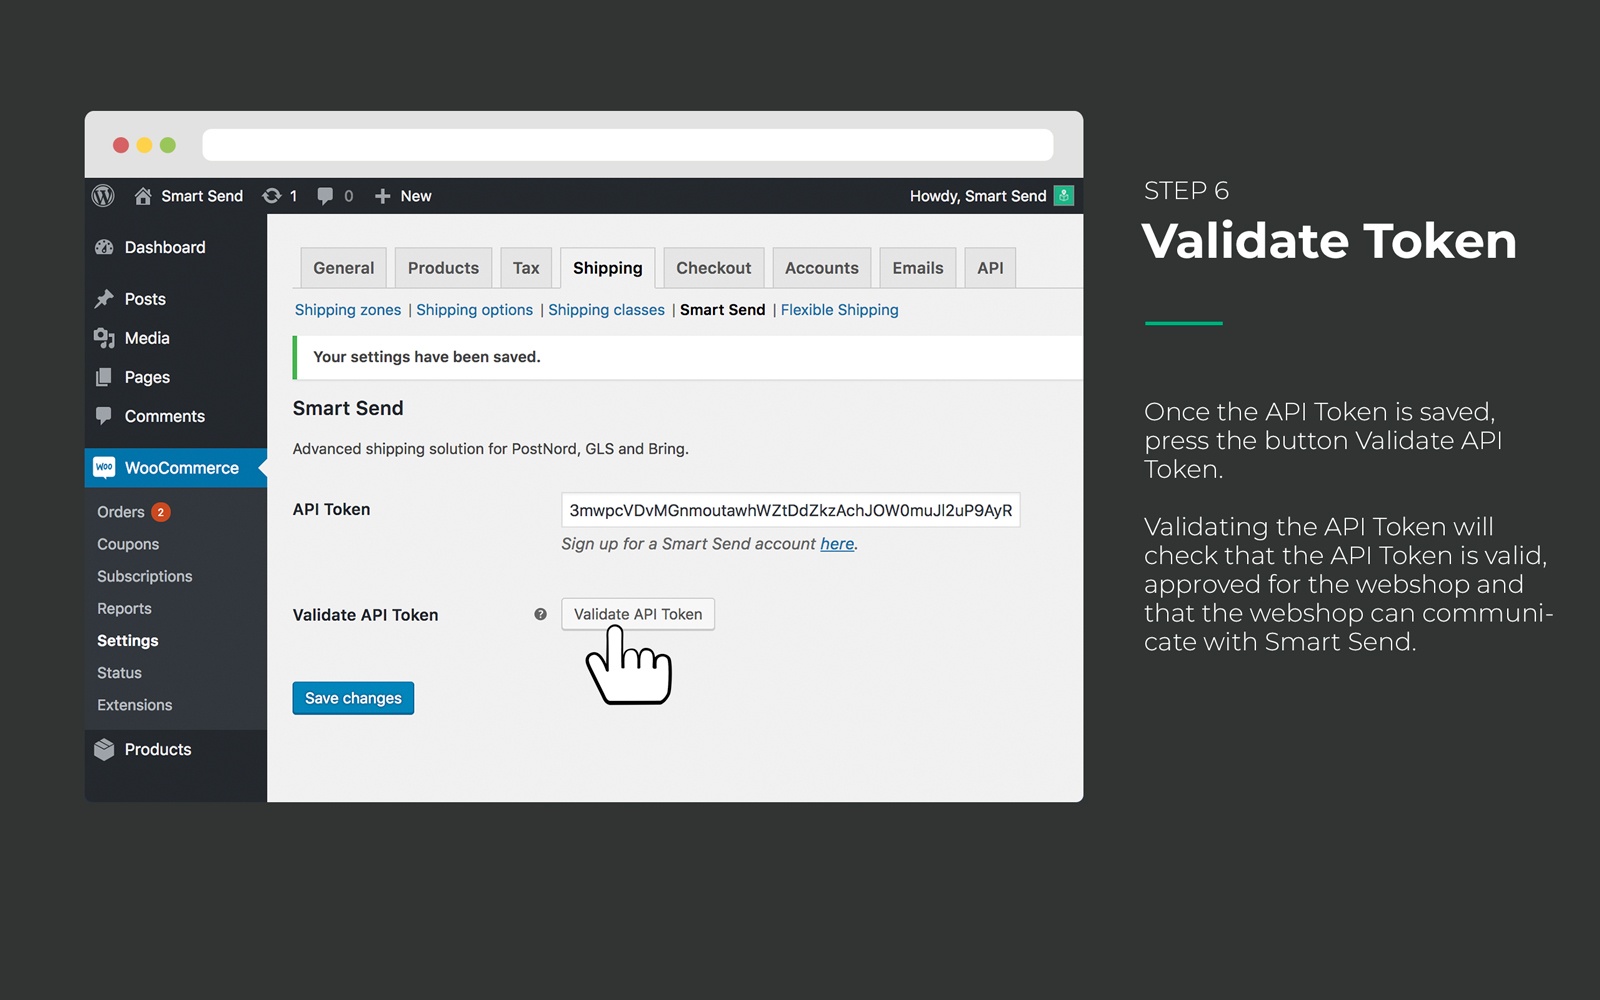
When you have saved your changes you are ready to validate the API Token
-
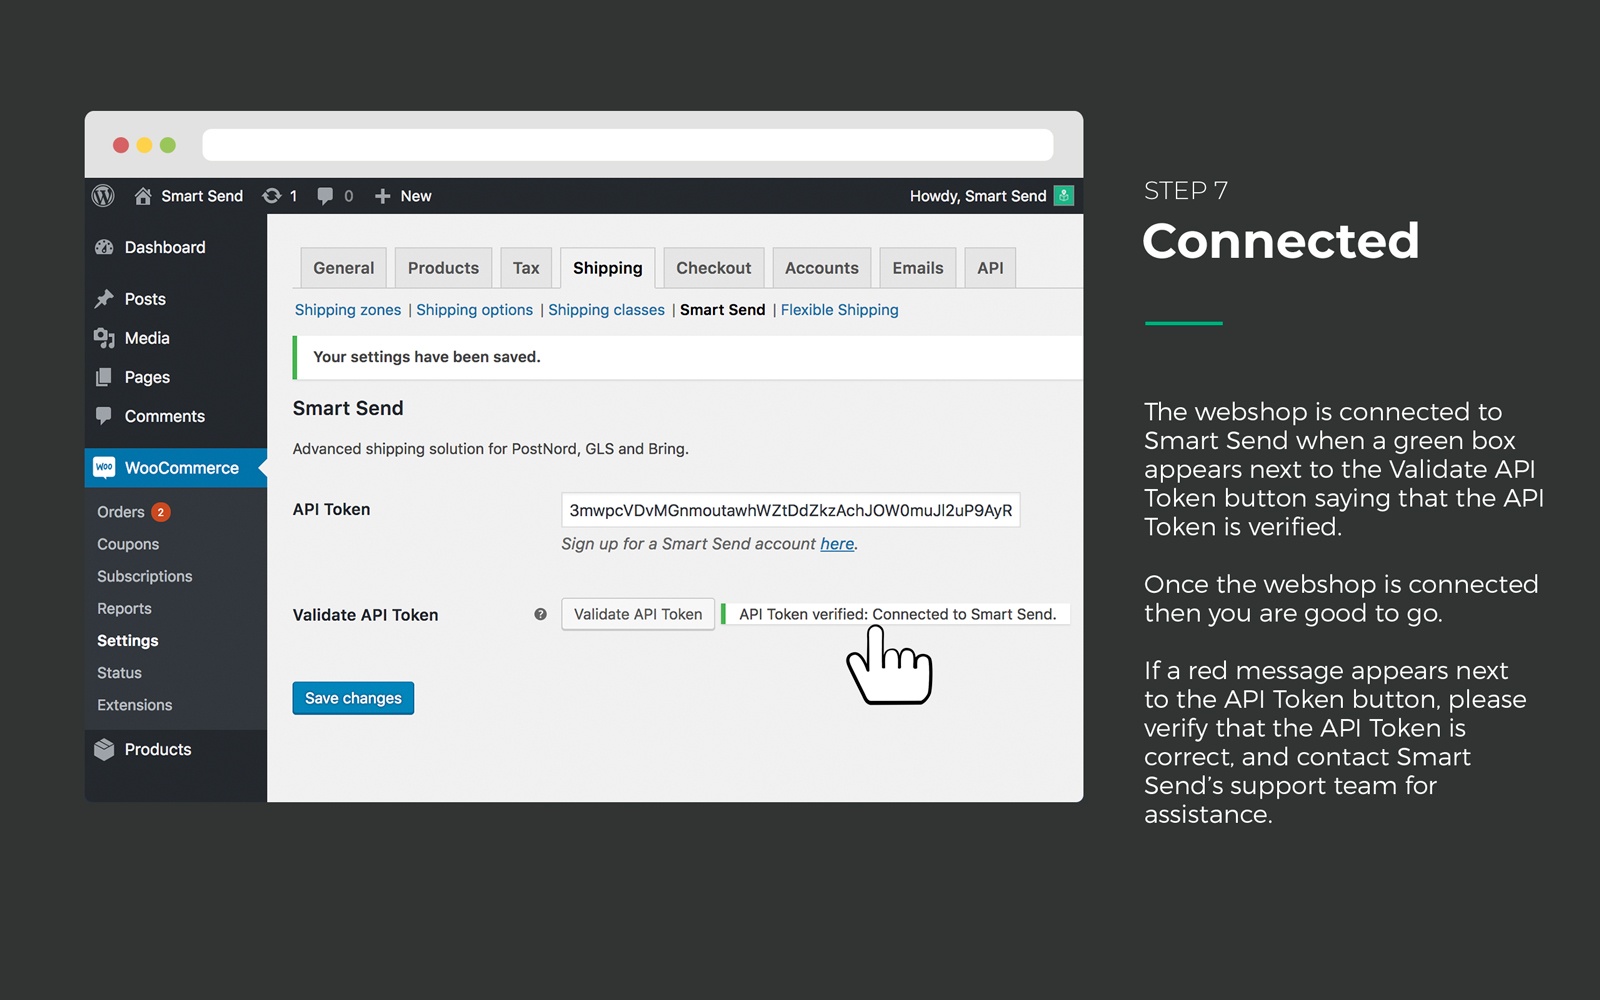
When you the API token is accepted you will get a green message with the text: API Token verified.
-
If you get a red error message, please fix the error descripted in the message. Most common errors are to forget to save the settings before validating or having registred another website URL on the Smart Send user, than the shops url. Eg. smartsend.io and smartsend.dk is not the same url. You are now ready to proceed to WooCommerce - Setup shipping methods
Setup Shipping Methods
This section is about setting up shipping methods in the Smart Send plugin. Make sure you have completed the section WooCommerce - Connect to Smart Send before going through this article
To setup a Shipping method first go to WooCommerce - Shipping - and edit the shipping zone for which you would like to add a shipping method
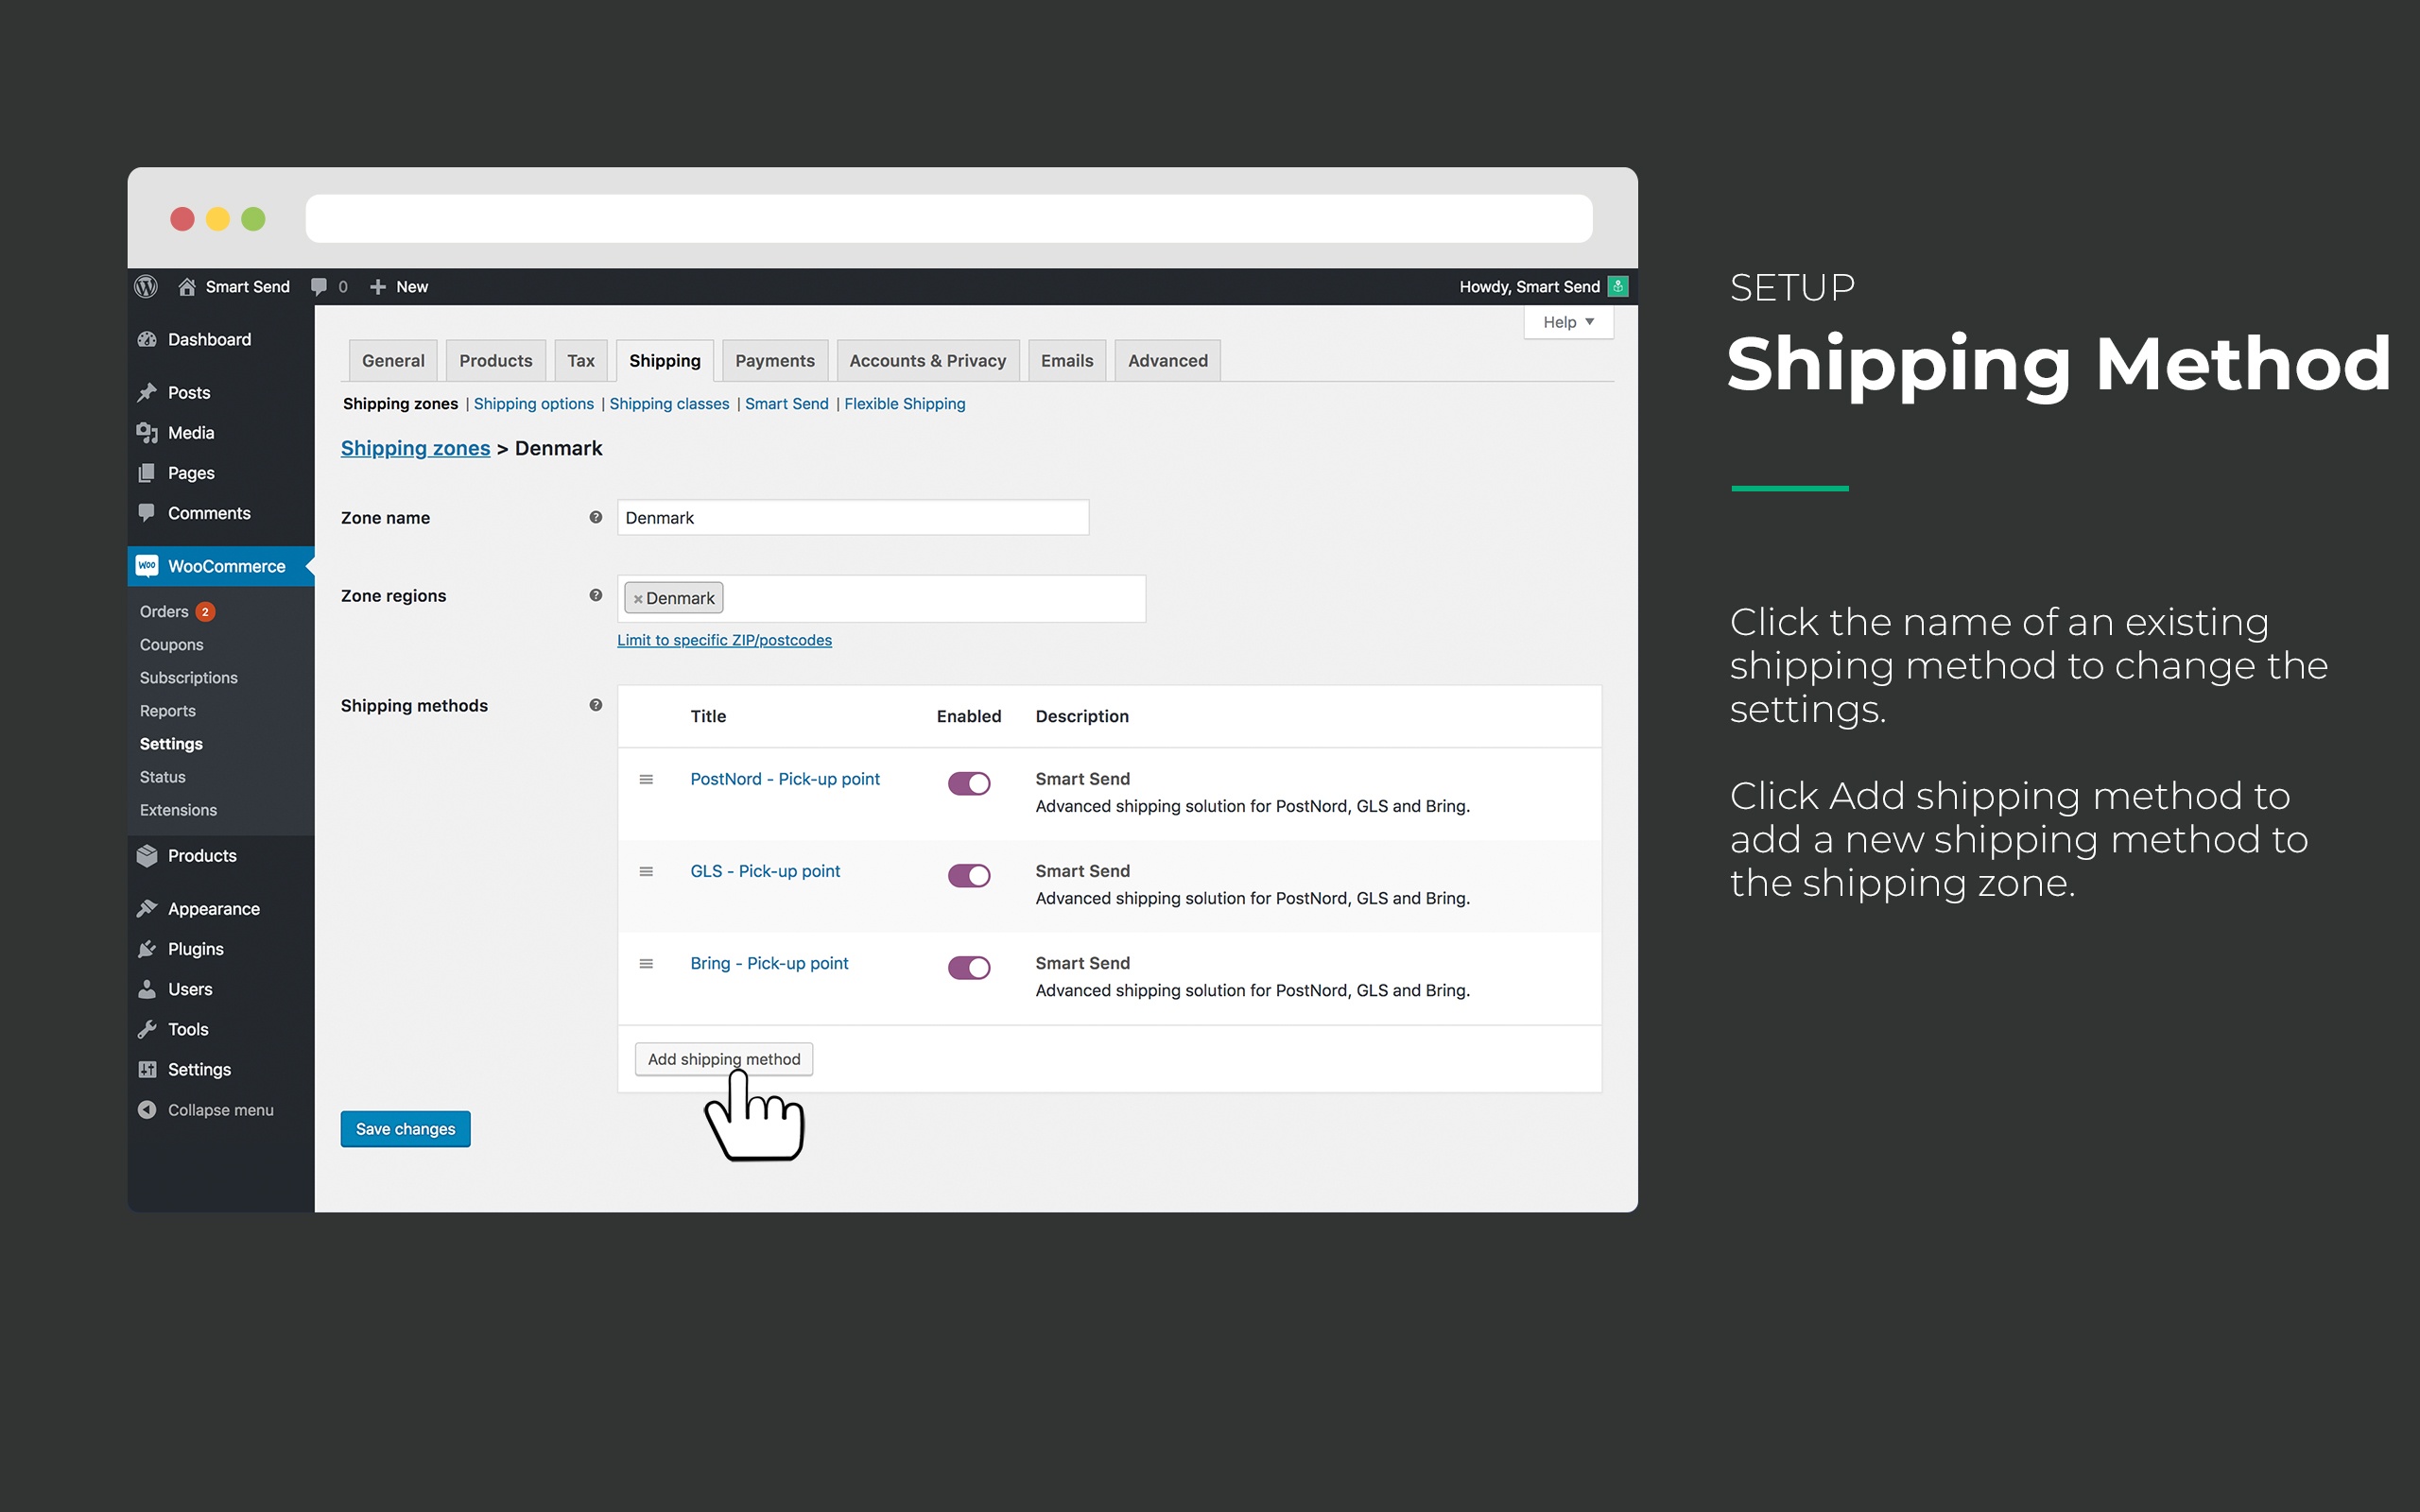
Setup Pick-up Points
You have 2 options when sending to pick-up points.
- Select pick-up point - The customer can chose their preferred pick-up point
- Closest pick-up point - The pickup point is chosen by the carrier upon booking the label.
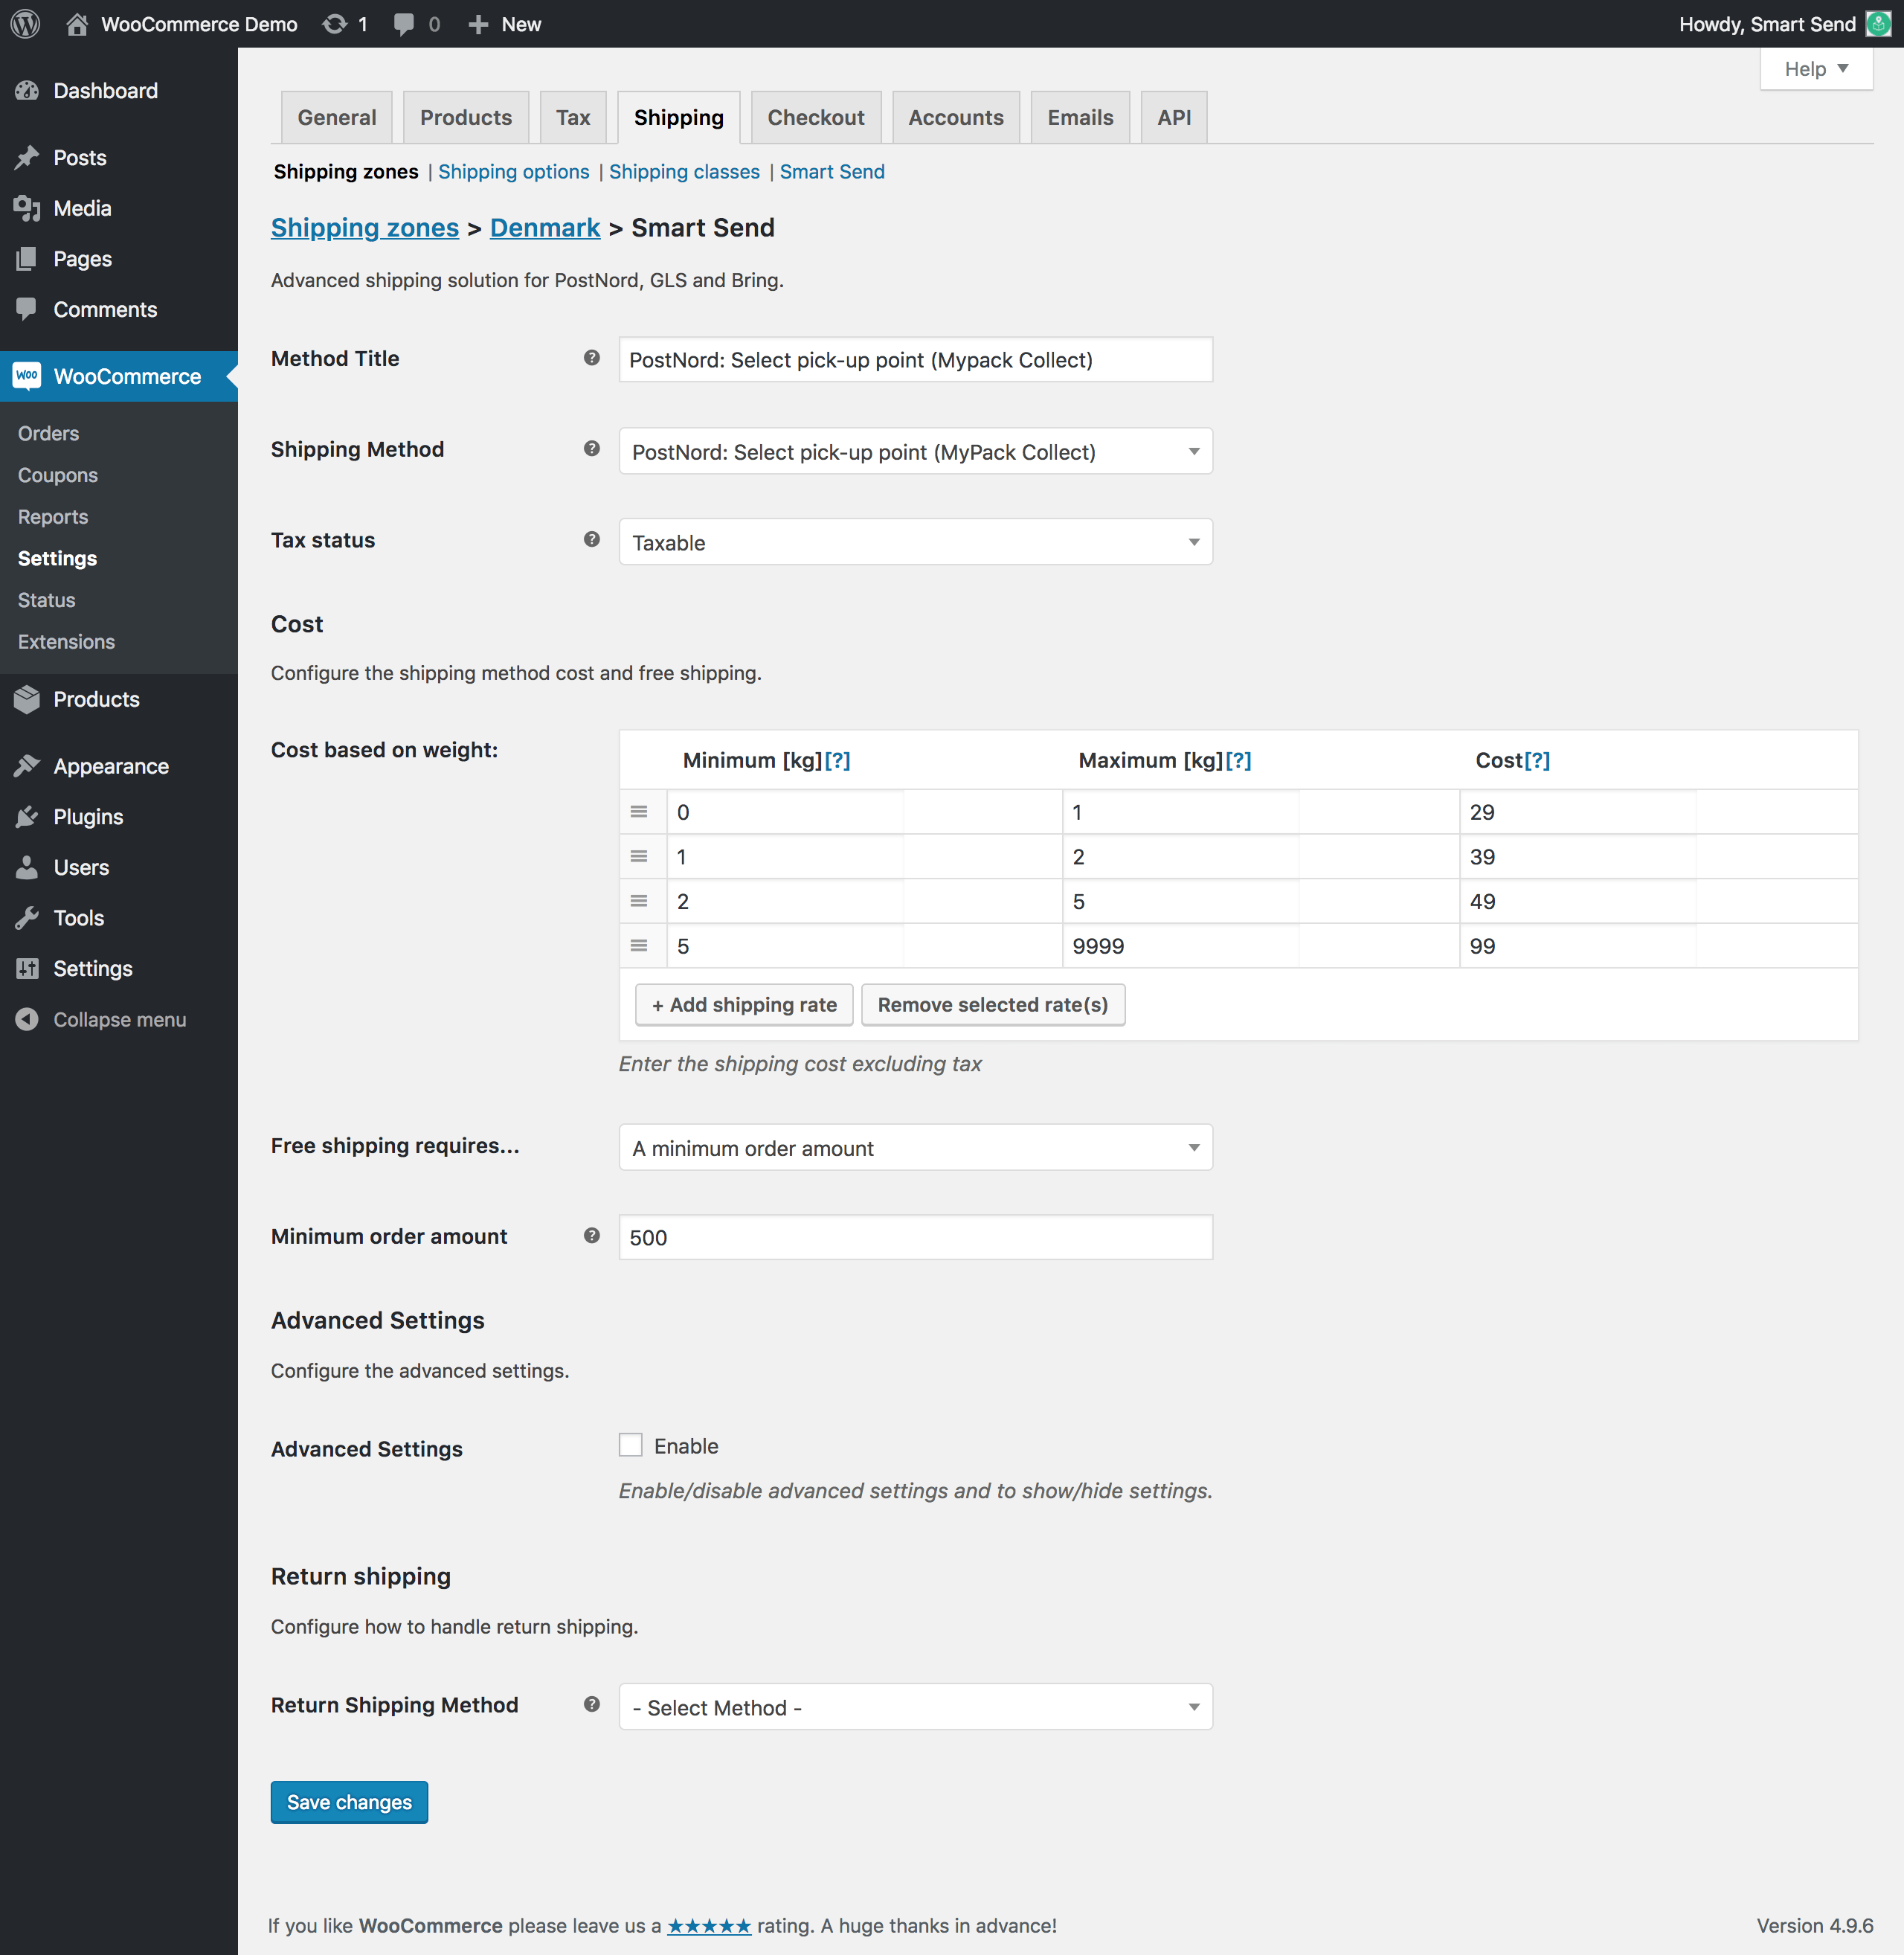
In the picture below the shipping method is set as a select pick-up point with PostNord.
Furthermore it has been set to increase the shipping cost based on the total weight of the products bought.
Finally there has been setup free shipping for orders above 500.
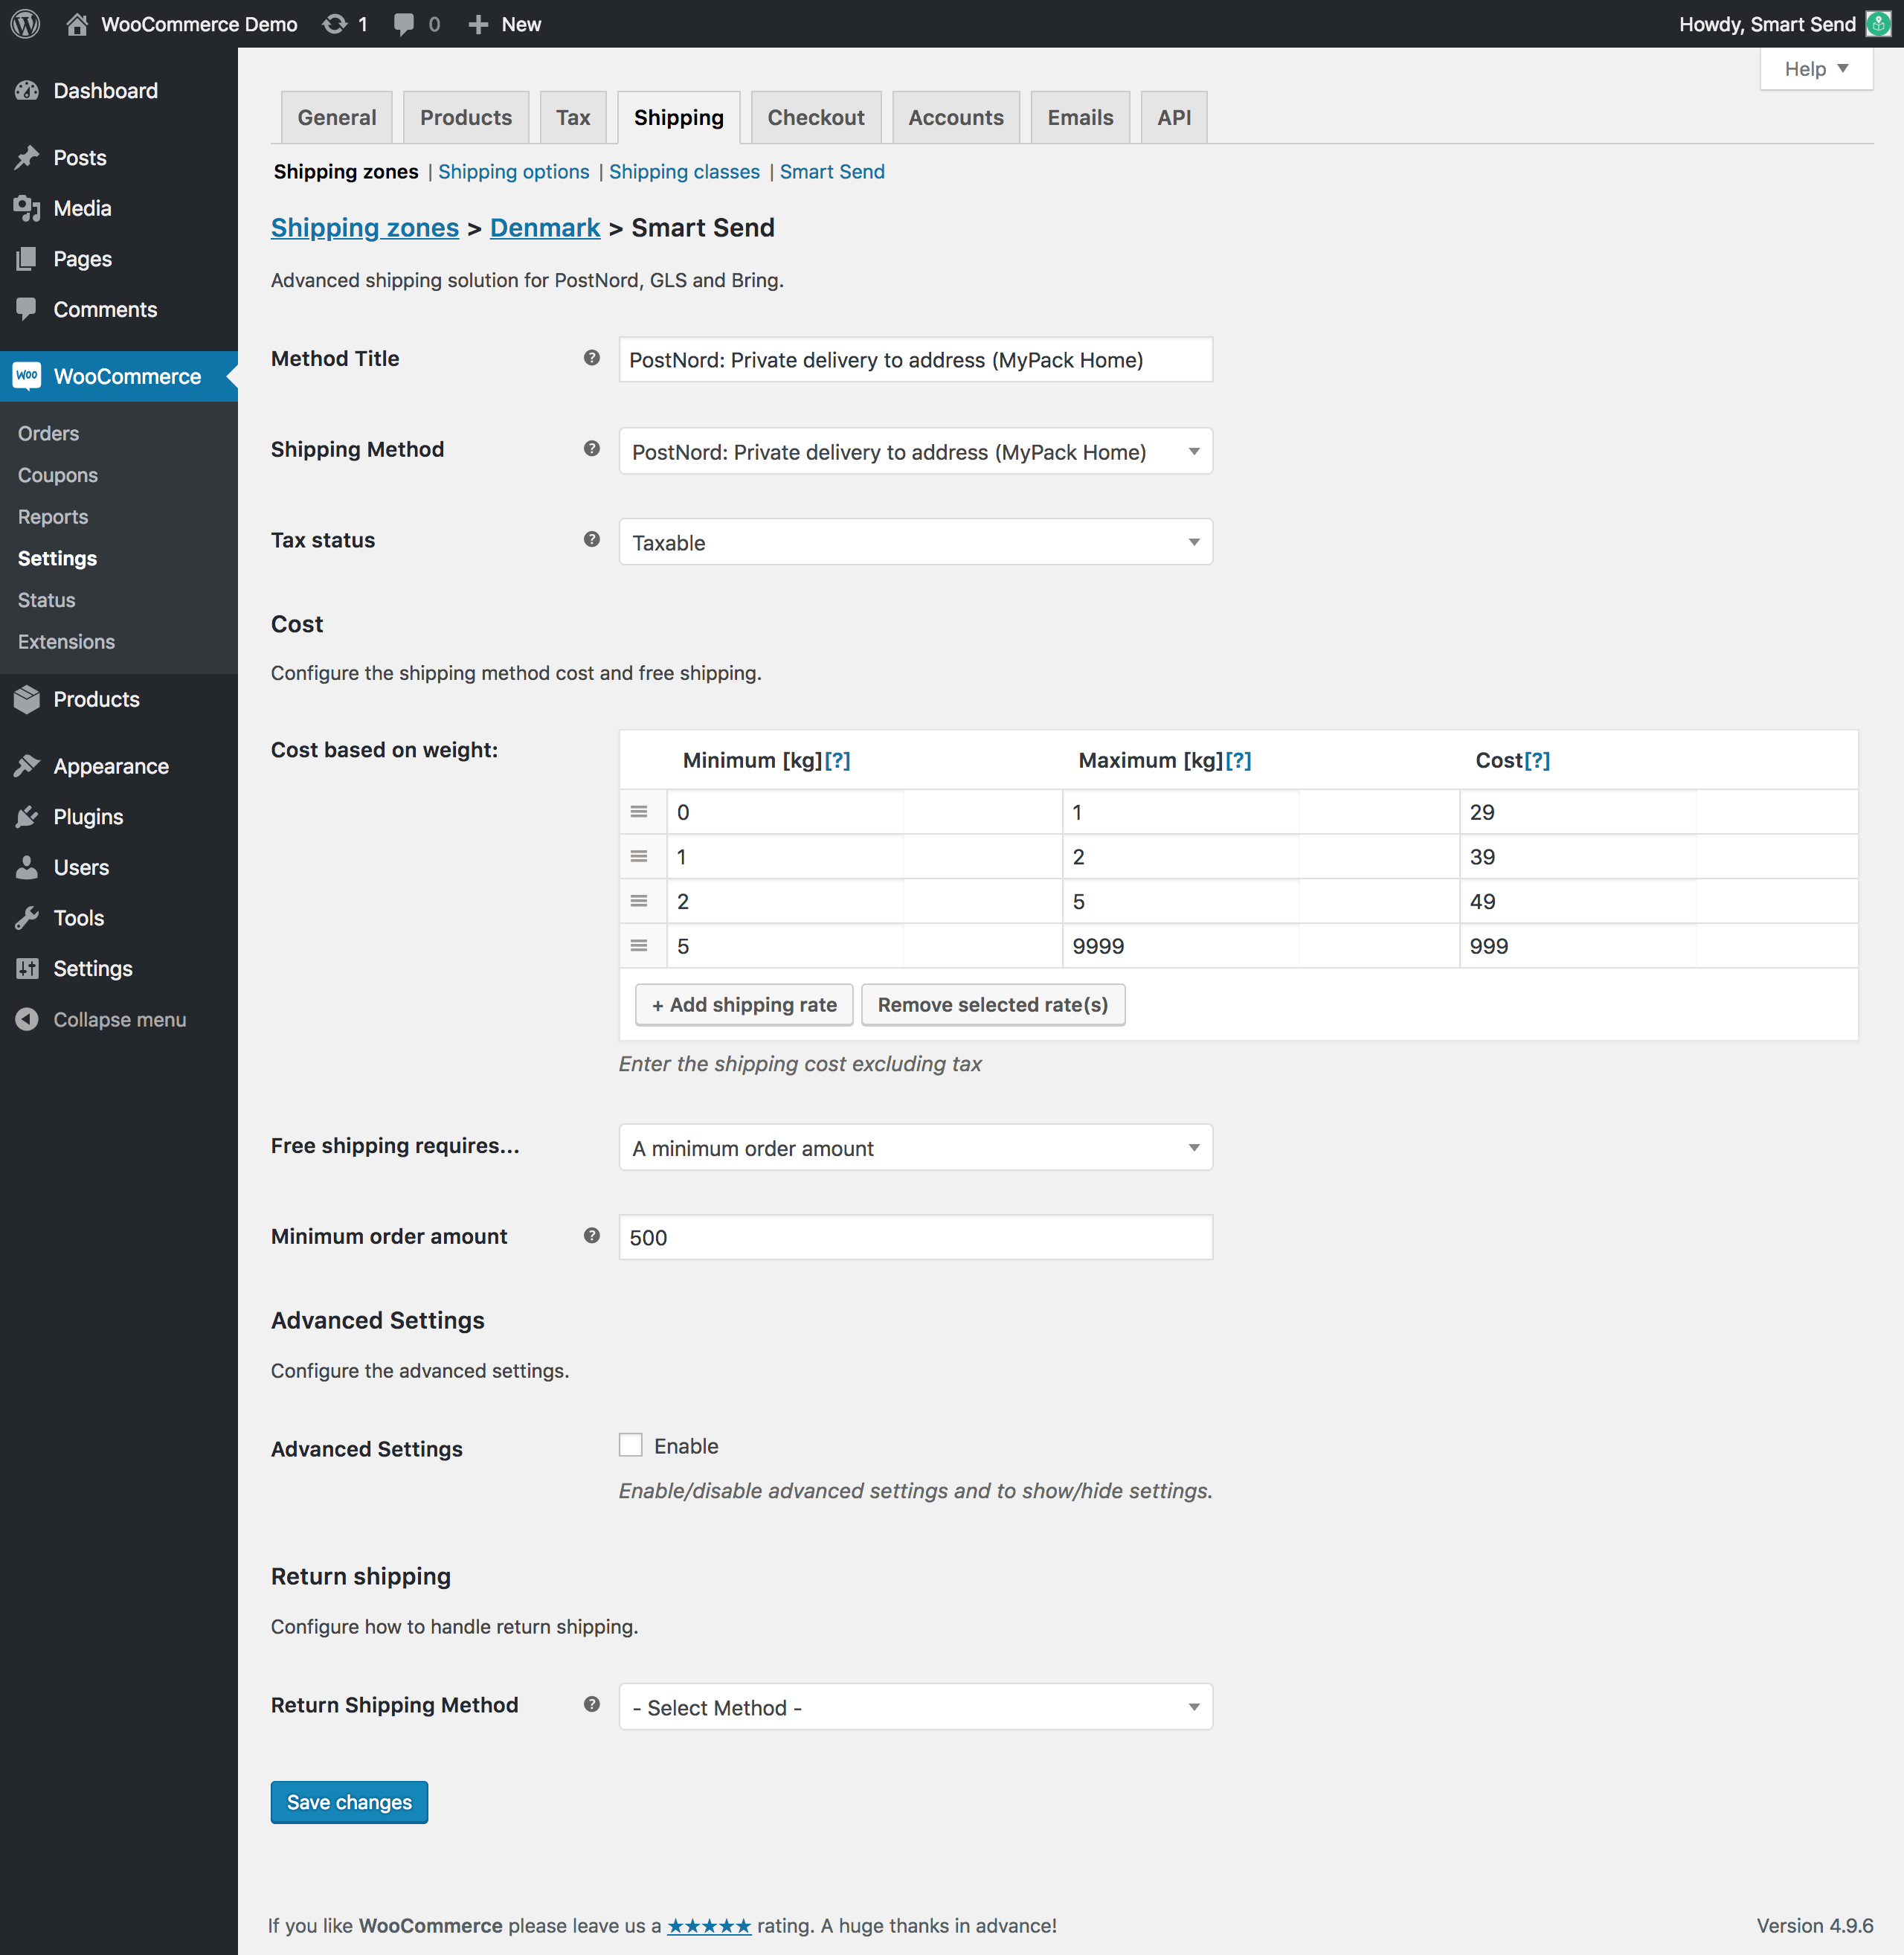
Setup Home Delivery / Delivery to address
In the picture below the shipping method is set as a Home Delivery with PostNord.
Furthermore it has been set to increase the shipping cost based on the total weight of the products bought.
Finally there has been setup free shipping for orders above 500.
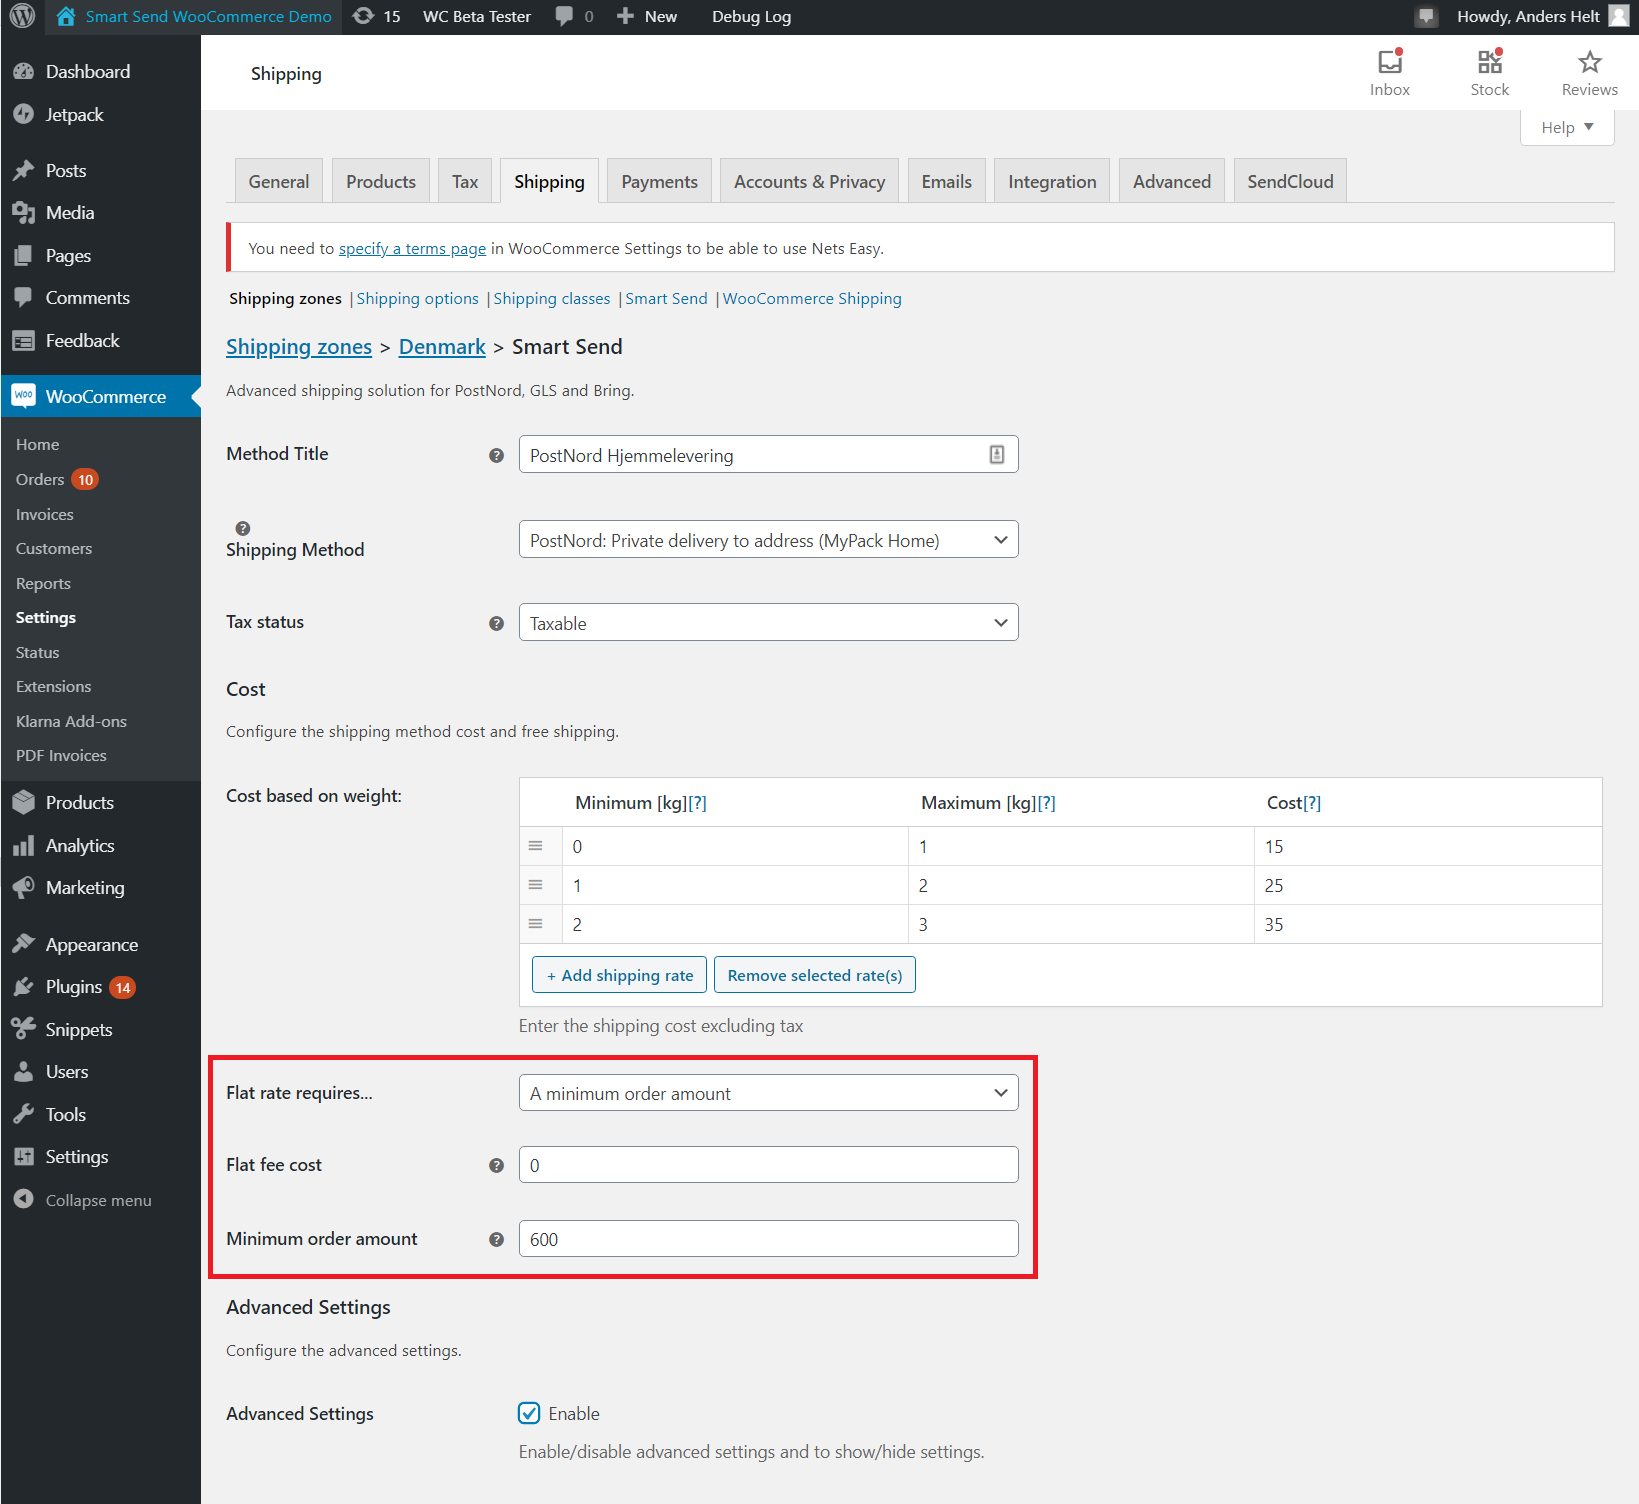
Setup Free Shipping and reduced shipping cost
Free shipping is setup through the Flat rate option on each shipping method.
The flat rate cost is the price paid by the customer when the condition "Minimum order amount" is met.
If you want free shipping is should be set to 0.
If you want a reduced price for orders over a certain amount, you can setup the reduced rated by typing in an amount higher than 0.
Setup Advanced shipping cost calculating
In the cost field for the shipping methods it is possible to use WooCommerce standard calculations.
In the picture below the rates are calculated in 3 different ways:
- Cost/weight - [kg]*10
- Cost as percentage of cart value - [cost]*[fee percent='10']
- Cost pr unit - [qty]*20

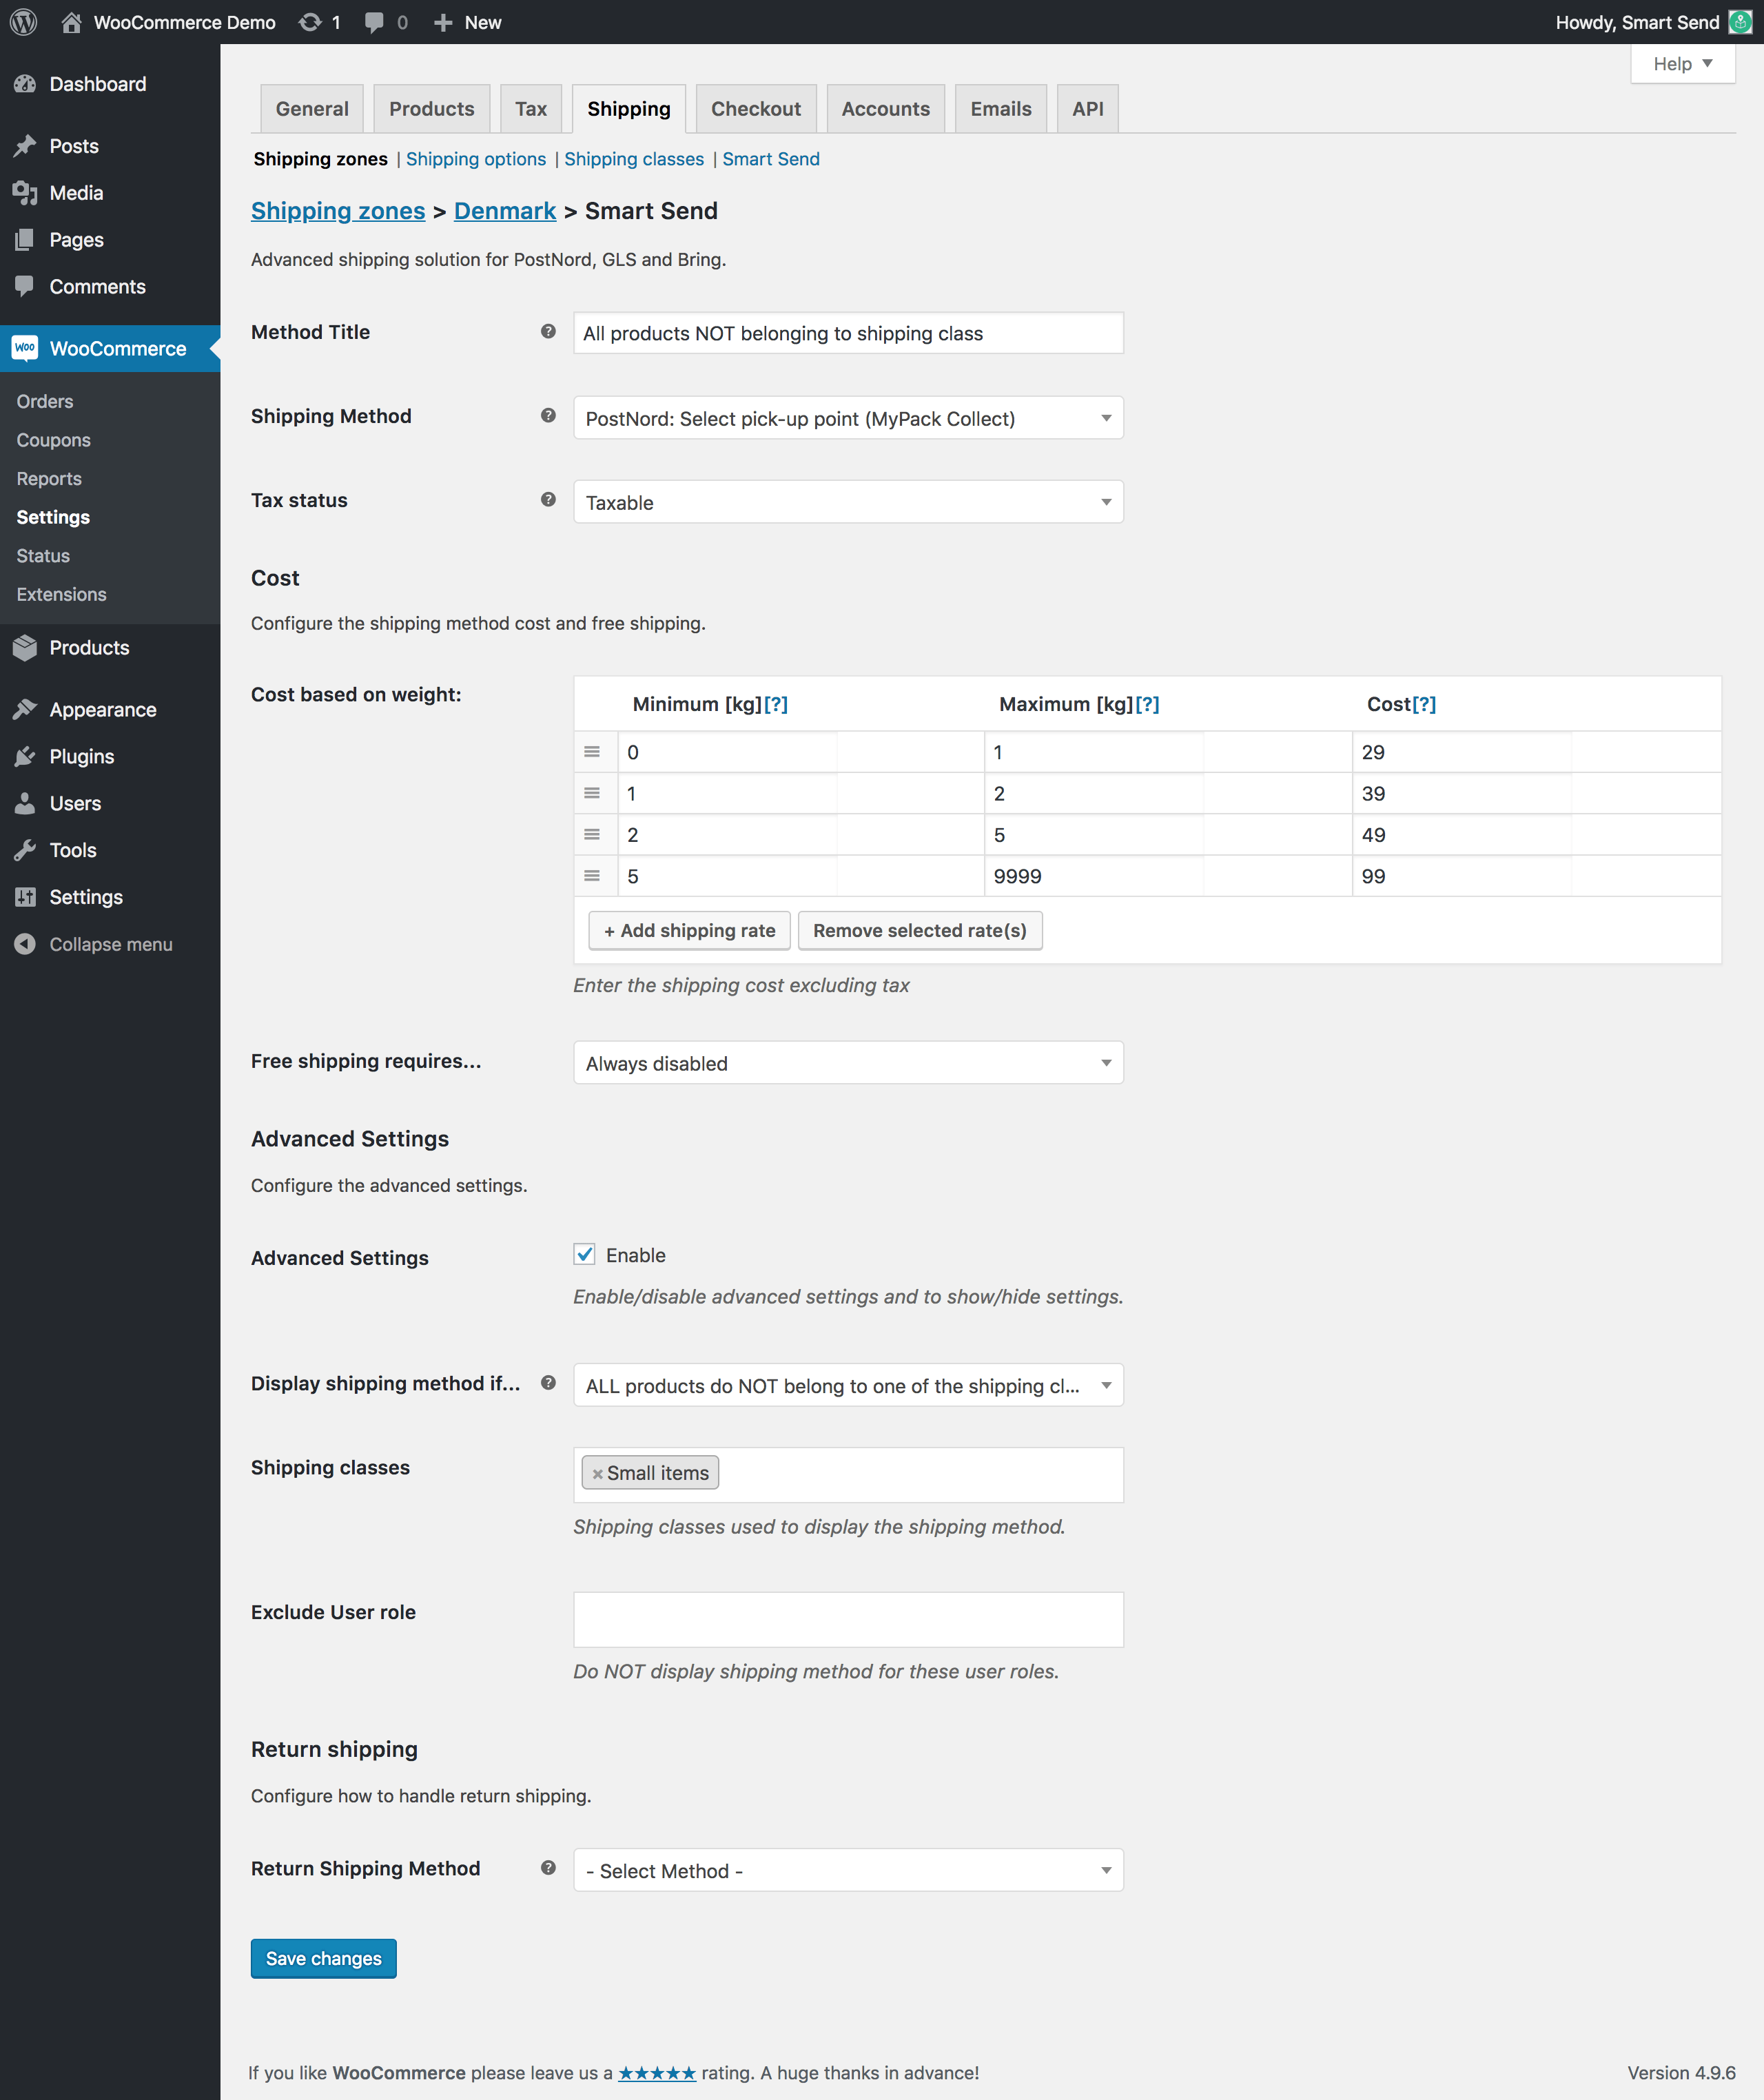
Setup shipping based on shipping classes
You have the option to either include or exclude products from one or more shipping classes. This allows you to hide a shipping methods if a customer buys both a small and a large product.
Example: You have a bicycle shop and a customer have bought a bicycle and a pump.
In this case you can't send the bicycle wilt a normal parcel and you want only send bicycle on pallets.
You can therefore setup a shipping method with "At least one product belongs to shipping class" to show the pallet shipping methods when buying a bicycle.

On the same time you should also have a method for the customers who only buys the pump and NOT the bicycle.
You will have to setup a second shipping method for the same zone, but where the dropdown for shipping classes is set to "All products belong to the shipping class" and chose the shipping class for the pumps.
Setup shipping based on user roles
You can make shipping methods valid for certain customer groups. This is specially useful if you sell to both B2C and B2B or wants to give a discount to returning customers.
This can be done in two ways.
Either by excluding specific customers type
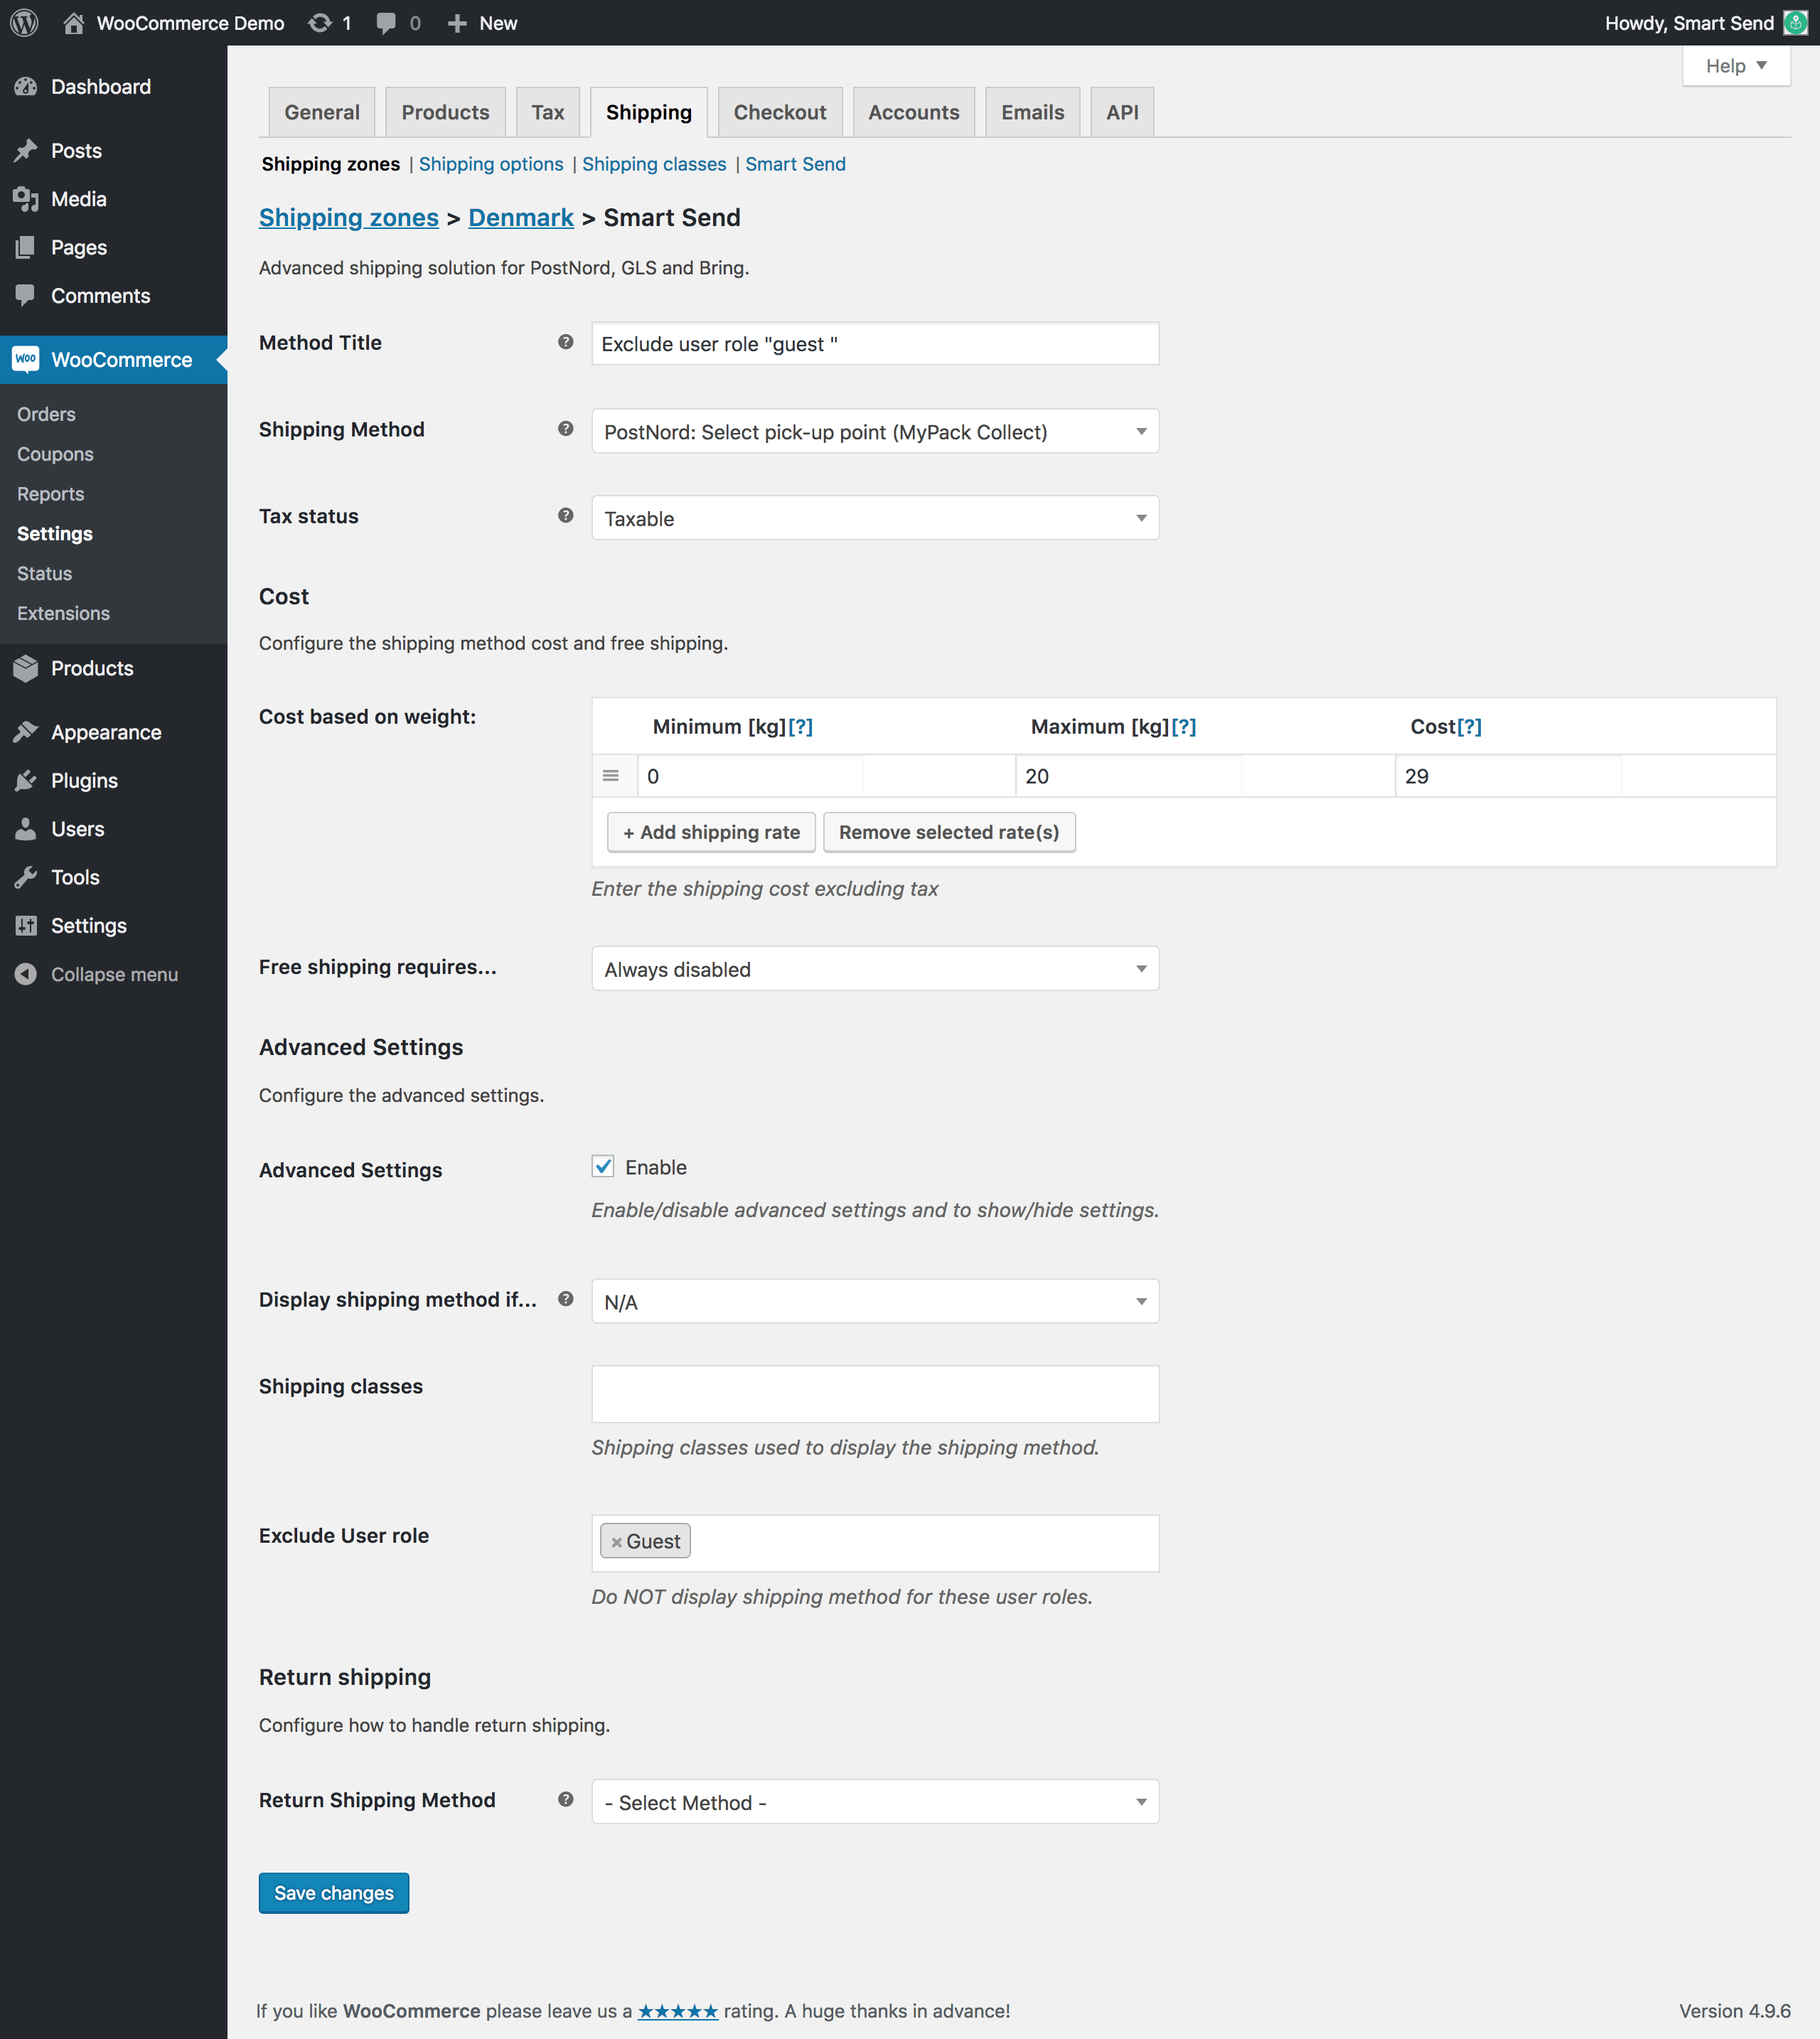
Or by excluding all customer types beside guests

Creating Shipping Labels
You can print labels either from the bulk actions tab in the order overview or from each order page.
Tracking
When labels are created in WooCommerce then tracking number and tracking link is returned to the shop and stored on the order.
We highly recommend providing this tracking information to your customers, but you have a few different options:
- (recommended) Use the 1st party WooCommerce Shipment Tracking plugin: Installing this plugin will add tracking links to your existing WooCommerce emails, and on the order tracking page and order view page.
- Let Smart Send send a standard tracking mail to the customer once the labels is created. This can be activated from within the Smart Send system
- Almost all carriers will send an email/sms to the receiver, but when the email is sent depends on the carrier and shipping method. Some are sent right after booking while are sent when the carrier receives the parcel. Note that this cannot be de-activated in most cases.
We highly recommend the WooCommerce Shipment Tracking](https://woocommerce.com/products/shipment-tracking/?aff=4229) plugin (option 1) because it allows you to include the information in the emails you are already sending out, instead of spamming your customer with multiple emails.
Bulk print
You can mark up to 5 orders at a time and choose "Generate labels"
Single print
You can go to a specific order and choose "Generate label" from the Smart Send logistics box.
Both action will provide you with a PDF file you can print and return a tracking link
Supported plugins
The Smart Send WooCommerce plugin is compatible with the following plugins:
- WooCommerce Shipment Tracking by WooCommerce: Add tracking links in emails, order tracking page and order view page.
- WooCommerce Subscription by WooCommerce: Let customers buy subscriptions from your webshop.
- Sequential Order Numbers by SkyVerge: Sequential order number is not a native part of WooCommerce and require this plugin.
- WooCommerce Multilingual & Multicurrency with WPML by OnTheGoSystems: Translate webstore to multiple languages.